Project Based Learning for Homeschoolers
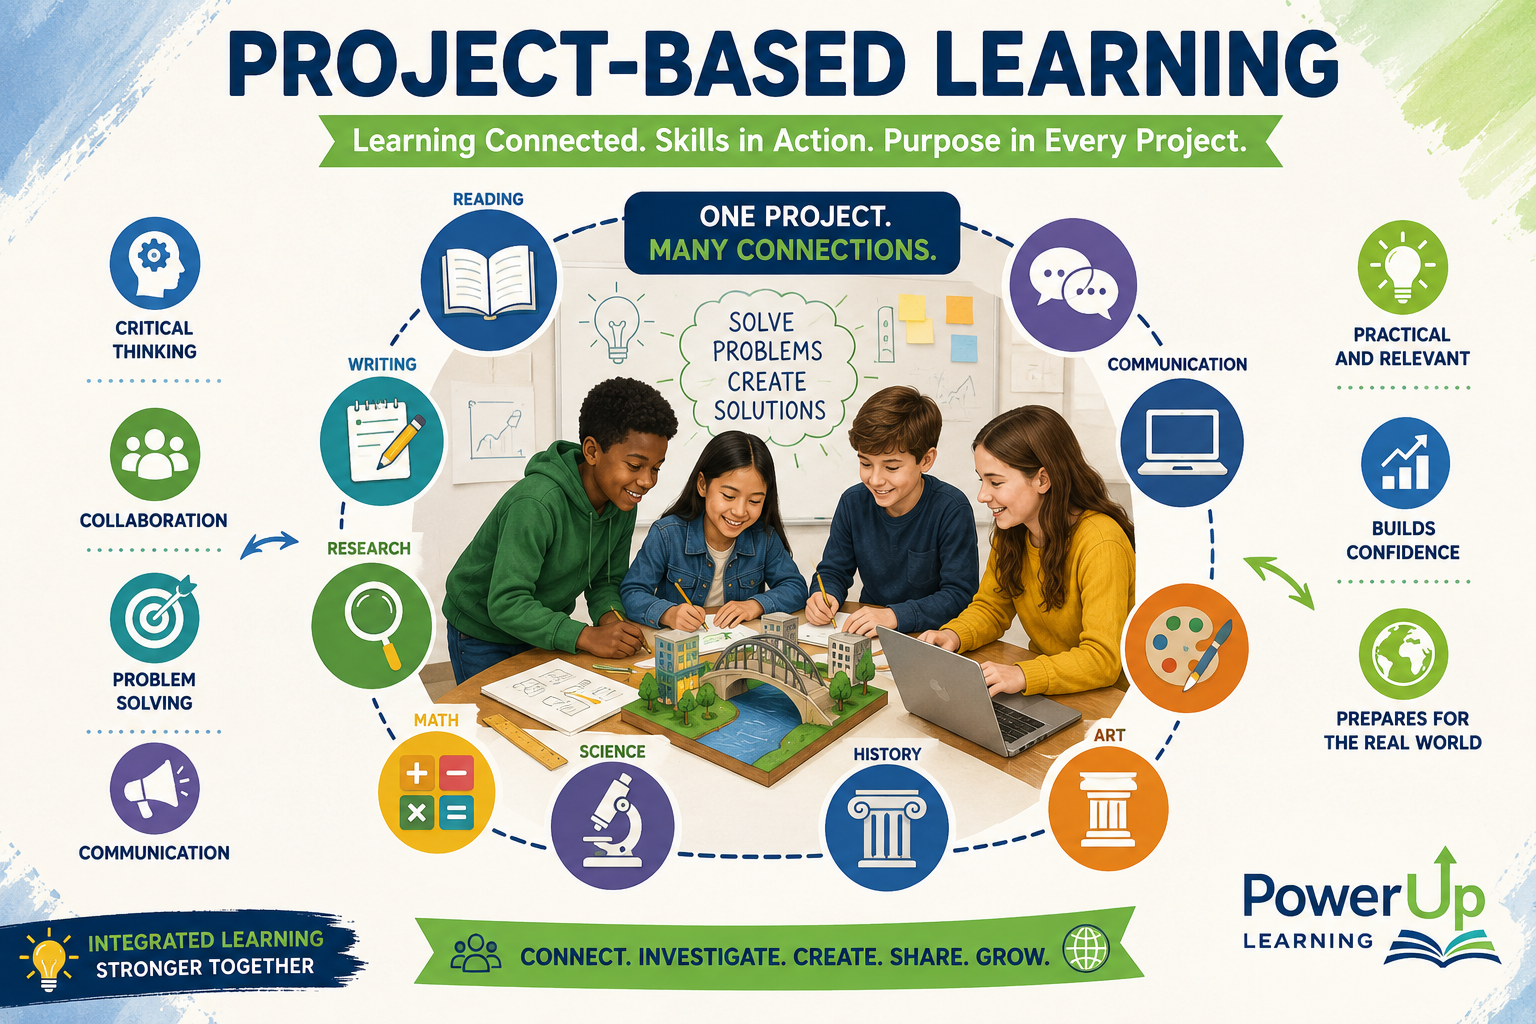
Project-based learning brings multiple academic subject areas together within one meaningful learning experience. Rather than studying skills in isolation, students discover that reading, writing, research, math, science, history, art, technology, and communication often work together to solve problems and create something purposeful. Through a single project, students may analyze historical context, calculate measurements, investigate scientific concepts, write explanations, design visuals, use digital tools, and present their findings to an audience. This integrated approach helps students understand that learning is connected, practical, and useful beyond the boundaries of individual subjects.
Project-based learning gives students the opportunity to do more than complete an assignment. The step by step process invites students to think deeply, work collaboratively, solve problems, and create something meaningful. When students work as part of a project team, they practice critical thinking by asking questions, evaluating information, making decisions, testing ideas, and revising their work when challenges arise. They also develop essential “soft skills,” such as communication, cooperation, leadership, responsibility, flexibility, time management, and respectful listening.
These skills matter far beyond a single project because they prepare students for real-life situations in which people must work with others, manage responsibilities, explain their thinking, adapt to new problems, and contribute their strengths to a shared goal. Through project-based learning, students build not only academic knowledge, but also lifelong skills that support confidence, independence, and meaningful participation in their families, communities, future workplaces, and civic life.
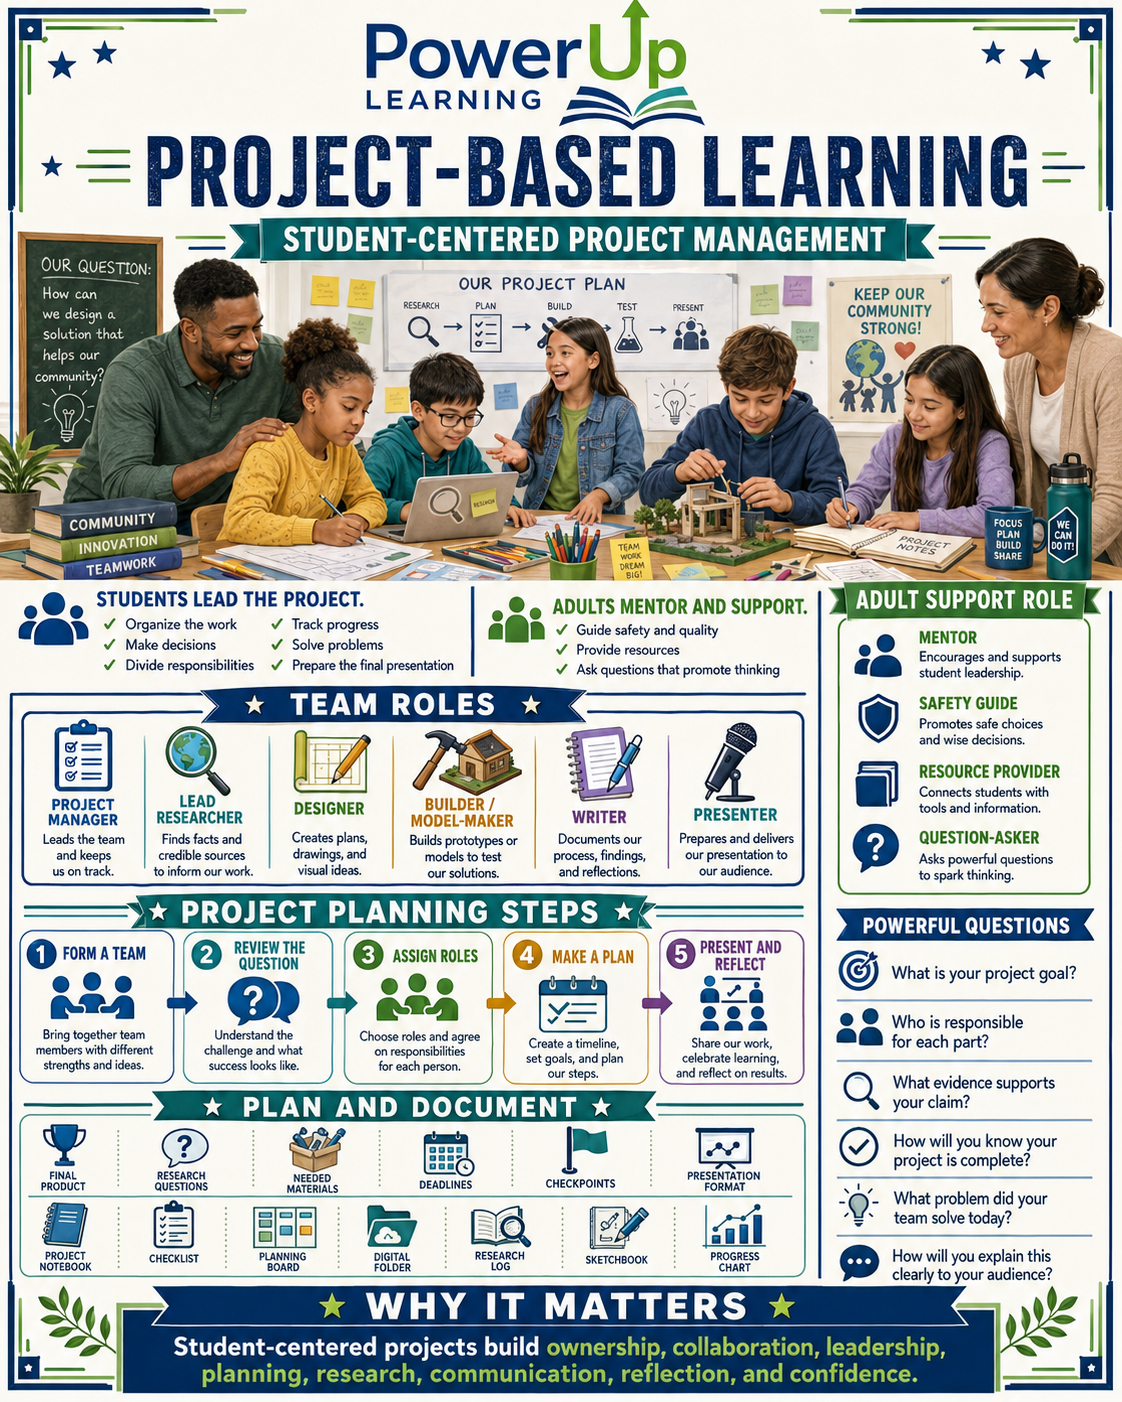
Student-Centered Project-Based Learning Process

Step 1: Begin with a meaningful project question.
Every project should begin with a clear question, problem, or challenge that gives students a reason to investigate, create, and present their learning. The project question should be open-ended enough to allow students to make decisions and explore different possibilities. Before beginning, students should discuss what the question means, why it matters, and what kind of final product could help them explain their learning to others.

Step 2: Form the project team.
Students should begin by forming a project team and identifying who will be involved in the work. In a homeschool setting, the team may include children of different ages, parents, grandparents, or other family members. Each team member should have a meaningful role. The goal is not for everyone to do the same task, but for each person to contribute according to interests, strengths, skills, and areas for growth.

Step 3: Identify what the team already knows.
Before beginning research or building a final product, students should talk through what they already know about the topic. This helps activate prior knowledge and gives the team a starting point. Students may create a “What We Know” list, a brainstorming chart, a project notebook entry, or a planning board. This step helps students recognize that learning begins with questions, observations, and existing knowledge.

Step 4: List what the team needs to find out.
After discussing what they already know, students should create a list of what they need to learn. These questions will guide their research and project work. Students might ask: What facts do we need? What sources should we use? What materials will we need? Who could we interview? What skills do we need to practice? This step helps students move from curiosity to organized investigation.

Step 5: Decide on the final product.
Students should choose what they want to create before beginning full project work. A final product may be a poster, model, map, exhibit, slideshow, video, podcast, written report, demonstration, brochure, timeline, performance, or presentation. Choosing the final product early helps students understand the purpose of their work and gives them a clear goal to work toward.
Step 6: Assign roles based on interests and strengths.
Students should divide responsibilities so that each team member has ownership of part of the project. One student may serve as the project manager who keeps the team organized. Another may be the lead researcher who gathers information. Another may be the designer who creates the visual layout. Another may be the builder or model-maker. Another may be the writer, and another may serve as the presenter. In smaller groups, one student may hold more than one role. Roles should be flexible, but each person should know what they are responsible for completing.

Step 7: Create a project plan.
Before beginning the main work, the team should create a project plan. The plan should include the final product, research questions, needed materials, team roles, deadlines, checkpoints, and presentation format. This plan helps students learn how to organize a larger task into smaller steps. It also helps the team stay focused and gives adults a way to support progress without taking over the project.

Step 8: Choose how the project will be documented.
Students should decide how they will record their work as the project develops. They may use a project notebook, shared checklist, planning board, digital folder, research log, sketchbook, photo journal, progress chart, or binder. Documentation helps students see their progress, remember decisions, track changes, and prepare for the final presentation. It also helps them reflect on how their thinking changed during the project.

Step 9: Begin research and information gathering.
Students should gather information from reliable sources, such as books, websites, primary sources, interviews, videos, maps, photographs, field trips, or observations. Older students can evaluate source reliability, take notes, and compare information from multiple sources. Younger students can draw what they observe, help gather facts, listen to read-alouds, or identify important images. The adult can help students locate appropriate resources, but students should do as much of the thinking and organizing as possible.
Step 10: Build, create, write, design.
Once research is underway, students begin creating the final product. This may involve writing text, building a model, designing a display, creating artwork, organizing photographs, making graphs, preparing a map, editing a video, or developing presentation slides. Students should make decisions, solve problems, and revise their work as they go. The adult’s role is to support safety, ask guiding questions, provide resources, and encourage students to improve their work without taking control.

Step 11: Track progress with checkpoints.
The team should pause at planned checkpoints to review progress. During these check-ins, students should ask: What have we completed? What still needs work? Are we using strong evidence? Is everyone completing their part? Do we need to revise the plan? These checkpoints help students practice responsibility, time management, communication, and problem-solving.

Step 12: Solve problems and revise.
Project-based learning should include challenges. A model may not work the first time. Research may be incomplete. A display may need to be reorganized. A team member may need help. Students should learn that problems are part of the process, not signs of failure. Adults can ask questions such as: What is not working? What could you try next? What evidence do you have? What did your team learn from this problem?

Step 13: Prepare the final presentation.
Students should decide how they will explain their work to an audience. The presentation may be given to parents, relatives, a homeschool group, a co-op, a library group, a community organization, or an online audience. Each student should have a speaking role or visible contribution. The presentation should explain the project question, what the team learned, how they created the final product, and why the project matters.
Step 14: Present the project to others.
The final presentation gives students a real audience for their work. Students may present through a museum-style exhibit, slideshow, oral presentation, demonstration, short documentary, podcast, poster session, gallery walk, or guided tour. Presenting helps students practice confidence, communication, public speaking, and the ability to explain their thinking clearly.
Step 15: Reflect on the learning process.
After the presentation, students should reflect on both the final product and the process. Reflection questions may include: What did we learn? What role did each person play? What problem did our team solve? What evidence supported our conclusions? What would we do differently next time? How did we use our talents and strengths? Reflection helps students understand that project-based learning is not only about the finished product. It is also about ownership, collaboration, leadership, planning, research, communication, and growth.
Teacher - Parent’s Support Role
Parents should not manage the project for the students. Instead, parents/teachers should serve as mentors, safety guides, resource providers, and question-askers. Their role is to help students think more deeply, work safely, locate useful resources, and revise their ideas. Helpful teacher prompts include:
What is your project goal?
Who is responsible for each part?
What evidence supports your claim?
How will you know your project is complete?
What problem did your team solve today?
How will you explain this clearly to your audience?
The strongest student-centered projects allow students to make meaningful decisions, solve real problems, use their talents, learn from mistakes, and present their work with confidence.